
Drip. Drip. Drip.
Maybe you hear it, or maybe you see it—water running down the wall, creating a paint bubble or sagging areas, or leaving dark spots and water stains on your ceiling.
Old roof shingles, improper installation and repairs, storm damage, and lack of roof maintenance can all cause leaks for this problem you can avail yourself services from totalcarerestoration.com. And with the average roof expected to last only 20 to 30 years, many homeowners will experience roofing failure.
A leaky roof is more than just a cosmetic problem. Along with ugly paint bubbles, water stains, and discoloration, rain coming in from a roof leak can result in damaged sheetrock walls and ceilings, soaked insulation, mold growth, rotted roof joists, electrical failure, fire risk, compromised structural integrity, and ongoing health issues resulting from mold and mildew.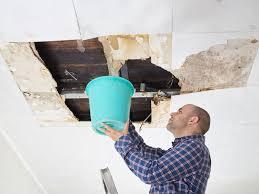
Here’s an easy guide you can use to fix a leaking roof from the inside.
Step 1: Locate the Leak
If you’re experiencing a leaky roof and it’s currently raining, the first thing to do is locate the leak and stop the flow of water into your home. This should be done immediately because even the smallest leak can lead to major problems if left unaddressed.
In many cases, the best way to find the leak is to access your attic and trace the water to its source. You may need to bring a flashlight. Visible signs of leaks don’t always occur directly under the source—in fact, water can often run down rafters and roof decking and across several surfaces before dropping to the attic floor.
If it’s not currently raining, you may need to wait until the next rain to find the leak.
When you find the source of the problem, use a permanent marker or thumbtack to circle or mark the exact place where the water is coming in. Repairs can only happen once the area is dry, so marking the spot when it’s actively leaking is important. Otherwise, you may not be able to locate the spot to apply a patch when it’s time for the repair. You can also use a small nail to direct the water and label the spot of the leak. Pushing a small nail into the hole will funnel the drips, making the water easier to direct into a bucket and marking the leak once the area is dry.
Be very cautious when in attic spaces—only stand or walk on ceiling joists, and never stand or put objects on the sheetrock ceiling or wet areas. This can cause the ceiling to collapse, and you or objects can fall through.
If you’re unable to access your attic or you don’t have an attic, you may need to call an emergency roofing company to address the problem right away. Once source for locating good roofing companies is The Prime Buyer’s Report, which lists Top Ten roofers near you.
Step 2: Limit the Damage
Once you’ve found the source of the leak, set a bucket or trash can under the area to catch the drips. You may need to put a board across the ceiling joists to give the bucket a solid place to rest. Again, do not put the bucket or tools directly on sheetrock or it could fall through the ceiling. If it’s safe to do so and you can easily reach it, placing a weighted tarp or heavy plastic sheeting on the exterior of the roof over the area of the leak will prevent more water from coming in.
If water has pooled on the attic floor or above the ceiling, use a towel or sponges to carefully soak up what you can. Remove any insulation or other material that may be holding water. If there is too much water or it has created a bulge or sagging spot in the ceiling, you may need to place a bucket under the bulge and make a small puncture in the center of the sagging area. This will release the water and prevent it from pooling and soaking into more of the ceiling structure. This is important because pooled water can cause the entire ceiling to collapse. It’s far easier and more cost-effective to repair a small area than replace an entire ceiling.
Next, you’ll want to dry the area as soon as possible. This means removing any wet insulation or debris, using towels to soak up standing water, and placing fans and/or a dehumidifier in the attic to dry surfaces. If the water has run down interior walls or is present in other areas, mop up what you can and aim fans at any damp areas to help prevent the growth of mold or mildew. If the flooding is severe, you may need to call a water damage company to ensure that it gets dried completely so you don’t have lingering problems.
Keep buckets under leaking areas and check them regularly, dumping them before they get full and making sure the leak isn’t moving or water isn’t flowing to other areas.
Step 3: Seal the Leak
Have these supplies ready:
- Rubber gloves
- Utility knife
- Scraper, putty knife, or similar applicator
- Silicone caulking
- Tar or roof patch kit
- A piece of shingle or plywood
You’ll need to wait until the roof is completely dry before sealing the leak, since sealants will only adhere to dry surfaces. Once the area is dry enough to complete the repair, find the area that was leaking.
You have two options for repair: apply a small amount of tar and piece of shingle or wood to cover the leak, or use a heavy-duty silicone caulk to plug the hole.
Most experts recommend using tar and a physical patch, such as a piece of roofing shingle or plywood. This provides the most solid repair. For this method, heat up a teaspoon to tablespoon of tar (depending on how large the leak is) and apply it liberally to the area around the leak. Then press the backside of an extra shingle or flat piece of plywood against the tarred area, making sure to completely cover the leak and a generous area around it. Let the tar cool while pressing the patch tightly against the surface to ensure a tight seal. You can add silicone caulking around the edges for added security.
If the leak is a tiny one and you’re planning to call a roofer to assess the damage, a small glob of silicone caulking can provide a temporary patch. However, this method isn’t nearly as permanent or strong as a tarred patch.
During rainy weather, you’ll want to regularly check the patch to confirm that no water is leaking in.
Step 4: Check the Roof for Damage or Wear
There’s a reason the roof was leaking. It could be a missing or damaged shingle, puncture from a nail or staple through the underlayment, incorrectly installed flashing, or a sign that your roof needs replacement. However small the leak, you’ll want to check the roof to make sure that it wasn’t a sign of a larger problem. If you can safely do so, access the roof and look at the area where the leak is present. You may need someone to tap the leak access point inside the attic to find it on the top of the roof. If there are no obvious signs of damage at the point of the leak, look above the leak for possible damage that allowed rainwater to run down the roof and under shingles to the leak point.
If you see damaged or missing shingles, damaged flashings, or other issues, you’ll need to call a qualified roofer to make repairs. Likewise, if your roof appears to need maintenance or replacing, that’s job for a professional. However, if you don’t see obvious damage and the interior patch is preventing further leaks, you can assume the problem has been fixed.
Step 5: Watch for Future Roof Leaks
Continue to monitor the previous leak area for new seepage, and address those leaks as needed. Keep in mind, though, that multiple leaks, leaks you can’t locate, or continued presence of water indicates a bigger problem, and you should protect your home investment by calling a local roofing company to assess the situation.
Most DIY roof repairs from the inside are only a temporary solution. You’ll need to hire a local roofing company to permanently fix the leak. To find good local roofers near you, visit The Prime Buyer’s Report for a list of Top Ten roofing contractors you can feel confident hiring.
